A concrete wall or ceiling can be given a sleek, polished look with the addition of furring strips. These components not only render a smooth finish; moreover, they offer insulation, sound reduction, and structural aid. While installation of furring strips to concrete may appear to be daunting at first glance, it is certainly doable with the right resources and commitment.
To ensure that you secure furring strips properly to concrete, begin by selecting the most suitable nails for the job. A galvanized option with both a sizable head and an elongated shaft is ideal, since this design allows for successful penetration into the concrete. Additionally, it is recommendable to opt for corrosion-resistant nails so they do not succumb to rust. To achieve even more success when fastening any furring strips to concrete, having a hammer, drill, and chisel at your disposal is an absolute must.
Equipped with the proper nails and tools, getting started on the job is the next step. Start by arranging the furring strips on the concrete in neat rows, mindfully assessing whether they are even and straight. Measurement is key; utilize a tape measure to gauge the distance between each strip. If a little bit of tweaking is needed, a level and a ruler can guarantee that all strips are aligned to perfection.
To abide by the appropriate steps while nailing into concrete, first drill pilot holes of equivalent size as your nails. Doing this allows you to guide the nails through the pre-made holes without deviating too much off course.
Once the pre-drilled holes are complete, you can move onto hammering in the nails. Concentrate on nailing into the furring strips one by one, making sure they go straight and fit snug against the strip. If not, it may require some chiseling to refine it to lineup properly. Remember safety comes first so don a pair of safety glasses and gloves when you’re pounding away and chipping away at the nails.
Giving the furring strips the once-over, verify that all nails are secure and none are protruding or unsteady. Assuming everything is in order, you can proceed to the next stage.
To finish up, get ready to join the furring strips to the concrete. An excellent sealant – capable of filling any crevices or cracks – is the key to creating a strong, tight bond. It’s crucial that the material has fully dried before being tampered with after use.
If you have the right tools, a bit of patience, and some know-how, you can easily install furring strips to concrete for a lasting, even finish. It may not be straightforward, but it’s definitely achievable and the results will be worth the effort.
Furring strips are a versatile material essential to many constructions initiatives. These slivers of wood fill in the gap between two different surfaces- most often separating a wall from a concrete floor- for improved insulation. The layer they form obstructs moisture and air from passing through, averting potential hazards such as rot and mold. Additionally, furring strips can be used to even out uneven surfaces and strengthen the structure’s support.
Whether you’re a construction novice or seasoned pro, nailing furring strips to concrete can prove to be a challenge. Yet the importance of securing them properly to achieve the desired result should not be underestimated. With its comprehensive coverage, this article is here to equip you with the fundamentals of furring strip installation – and show you how to nail them into concrete with ease.
Furring strips are a versatile solution available in various materials and ideal for a variety of applications. Wood is the most commonly used furring strip, renowned for its strength and longevity. Yet metal and plastic can be great alternatives depending on your project needs. For exterior use, metal furring strips are often your best bet, while plastic furring strips are preferable for indoor use; making your choice in materials an important one to ensure success.
Before starting to add furring strips to the concrete, get it ready by sweeping it and ridding it of dust. Afterward, utilize a hammer and tap into the concrete, making holes with it in preparation for nails. The caliber of these holes must match the size of nails chosen for the job.
Hammering in the furring strips? Start at the top, then work your way down – making sure to keep the nails two inches apart. This will keep the furring strip firmly fixed to the concrete, making sure your pilot holes are put to good use.
If you plan on affixing furring strips to concrete, then three-inch nails will perfectly suit the purpose. Anything longer or shorter may critically undermine the entire assembly and should, therefore, be avoided.
To be able to effectively affix furring strips into concrete, a hammer with a claw is the best tool for the job. This type of hammer gives you the perfect purchase on the nails so that you can trust and rest assured that they are securely set in place.
After hammering the furring strips firmly into place on the concrete, it is vital that they are secured against rain and moisture. To safeguard them, give the entire area a generous layer of sealant or an appropriate waterproof coating. This will guarantee that no moisture has access to reach the furring strips and they remain untouched by the surrounding environment.
Nailing furring strips into concrete doesn’t have to be an arduous task – it can be relatively straightforward if one takes their time. Having the right tools and patience will allow you to ensure that the strips are securely and properly fixed into the concrete for greater strength and insulation. With focus and attentiveness, the job of nailing furring strips into concrete can be acheived without much trouble.

Related Product

U Sod Staple
Product Information: Landscape Staples * 11 GAUGE STEEL CONSTRUCTION: The points on the staples are sharp enough to pierce commercial ground cloth, and the staples are long […]
Plastic Strip Nail
Product Information: Diameter/mm(±0.05mm) Length/mm(±1.5mm) 2.87 50/60/65/70/75 3.05 70/75/83/90 3.33 75/83/90 3.76 75/90/100/130 4.11 75/90/100/130 4.5 75/90/100/130 Featur […]
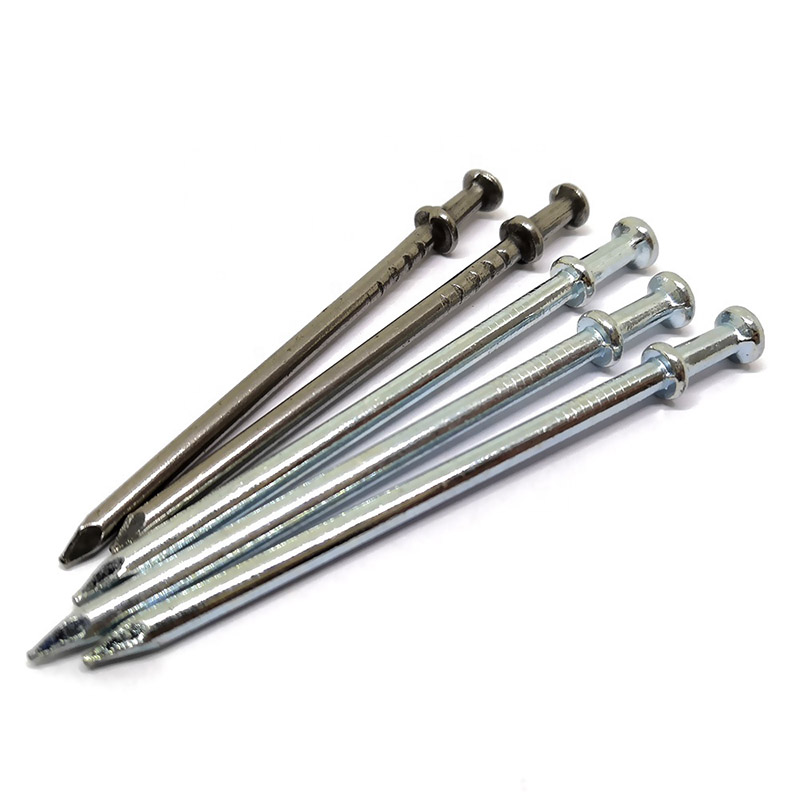
Double Head Nail
Product Information: Material Q195/Q235 Surface Treatment Bright, E.G, H.D.G, M.G, V.C, C.C, P.C and so on Head Two Head Shank Smooth Shank Point Diamond Point Kinds of pa […]
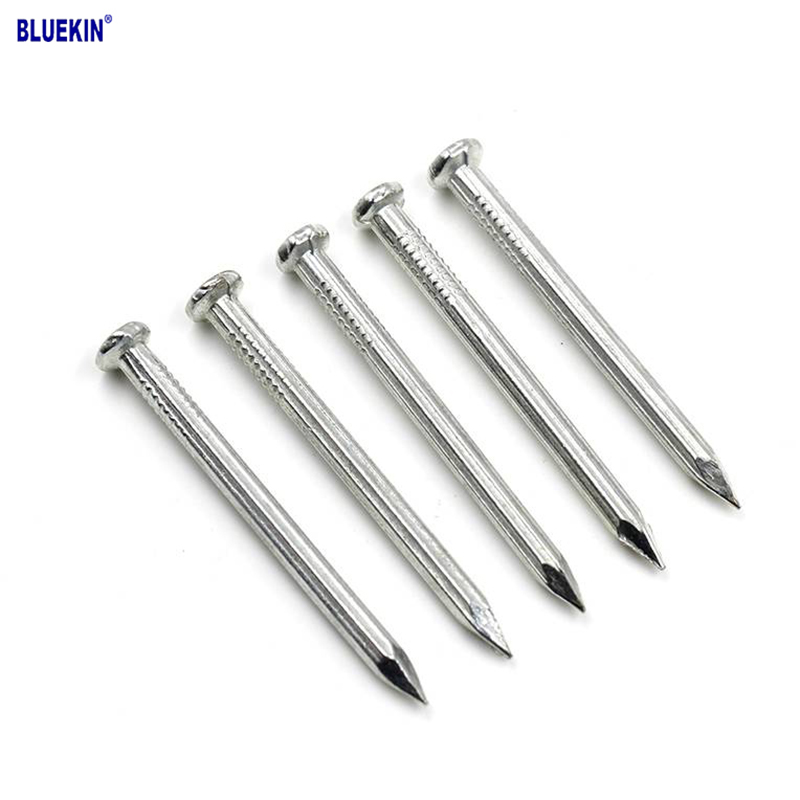
Concrete Nail
Product Information: Product name CONCRETE NAIL Material: #45 or #55 Steel Size: 1/2″-6″ Type: Round head with smooth shank or groove shank Treatment: Electro galvanized, ho […]
Headless Nail
Product Information: Cheap Lost Head Nails/ Headless Nails/ Finishing Nails Price Material Q195 or Q235 iron wire rod or according to request Size 1″ – 6″ Finish Polished or […]

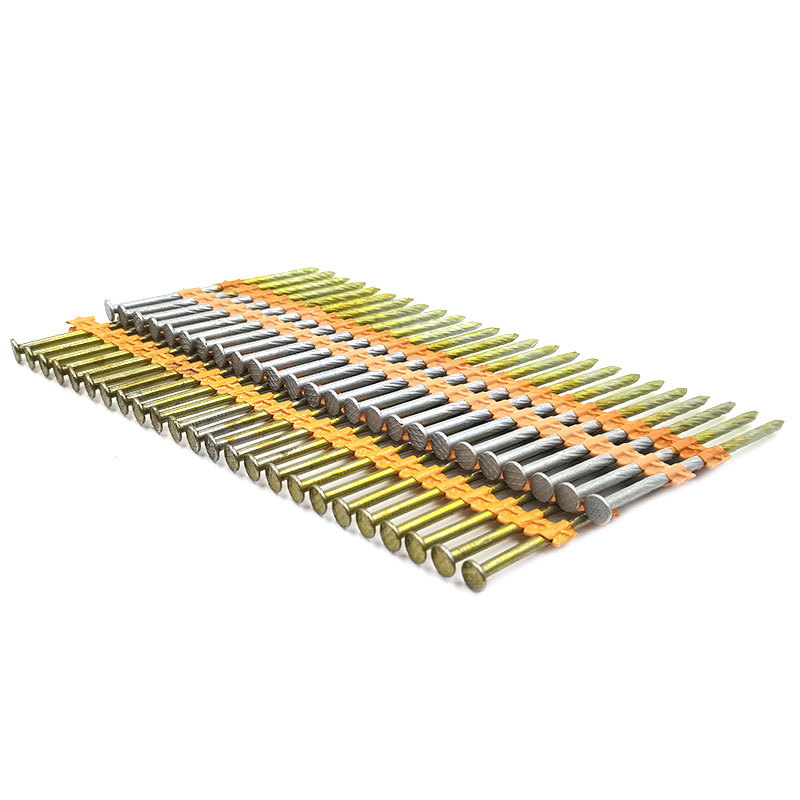
Paper Strip Nail
Product Information: Material Q195, Q235, stainless steel Surface Finish Bright, Galvanized, Hot Dipped Galvaized, Electro Galvanized, Zic Yellow, Zine Bule, MG, Dacro, etc. […]

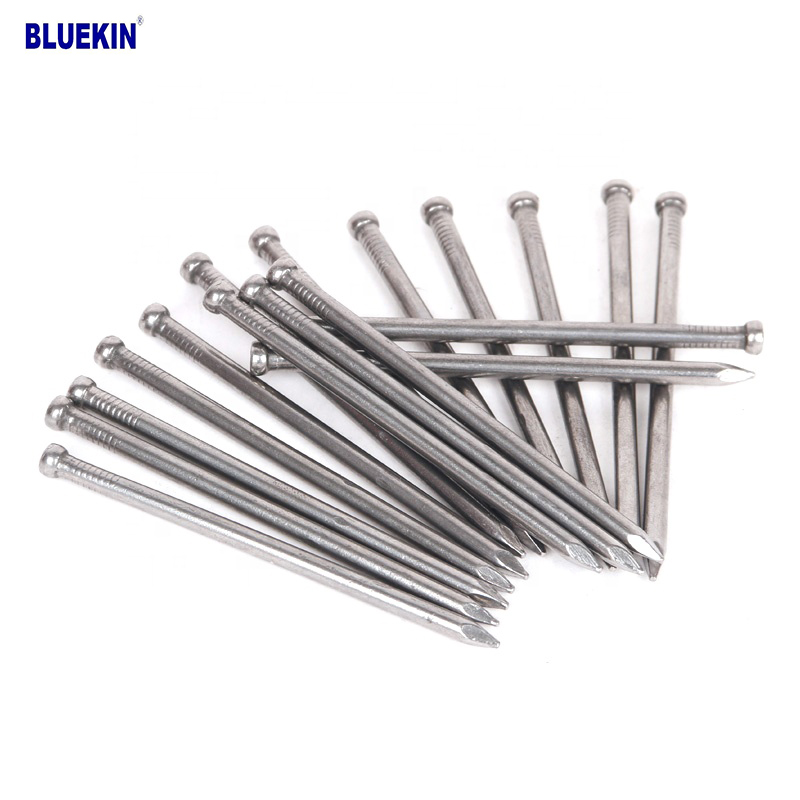
Black concrete nail
concrete nail with special materials, concrete nails are specialty nails compared with common iron nails. It is harder, the shank is short and thick commonly and it has excellent p […]

Garden Nail
Product Information: Black or yellow color plastic ground pegs are used for fix the ground cover or woven fabric or fleece on the ground. Material: Virgin PP OR PP +UV stabi […]
Fence U Nail
Product Information: U TYPE NAIL 1.material: Q195/Q235 Low Carbon Iron Rod 2.shank: smooth shank, single barbed shank, double barbed shank and others 3.Point: side cut point or di […]
